How to use?
Start the program. Now you can directly create a new disc space report. If you want to load an existing report instead just click on Cancel.
The dialog for creating a new report looks like this:
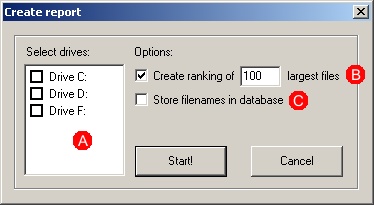
Specify the drives you want to include in the report by clicking on the respective check boxes (A). If you desire the ranking of the Top N files active this option by checking the box and determine the size of the ranking (B) (100 seems to be an appropriate number). Additionally you might want to store the filenames into the reports (C). This is useful if you are evaluating the report on a different computer.
Push Start! to begin the computation. This may take some time but a progress window will appear pretending that your system didn't crash :)
After creating the report you can browse it in the main window:
Double-click on a folder to expand the branch of the tree structure in order to see more details about the subfolders.
On the right side of the main window you find the list of files of the folder that you have currently selected in the report view. If this view is not available the folder has either been removed or you're watching a report of a different computer which does not include the file lists of the folders.
If you have created a ranking you find it at bottom part of the main window. You can either browse through the ranking of each particular drive or read the overall ranking of all drives that have been incorporated into the ranking.
Creating, saving and opening of reports is done using the File menu as usual.